


Step 6
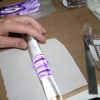
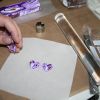
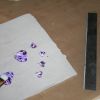
It is time to slice. I slice on some paper. Start you cut at the corner. Clay is kind of like slicing a tomato it forms almost a skin if you score it first just a bit your slicing goes much smoother. You want to slice straight down. You want your slice 1/8 to ¼ inch thick.

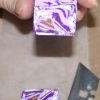
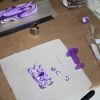
If you cut two pieces and then open them like a book you get a mirror image.
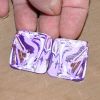
If one slice is thicker than the other slice, you can gently press it between your fingers all around you can get it to the same thickness without distorting the pattern.
If you want matching earrings. Place them side by side and with lite even pressure roll you roller over them. You can also press down using a block of some sort, I have acrylic block for stamping that I use. What you are doing is evening the thickness and removing any drag marks from cutting. Then take you cuts from the exact same spot on each slice.
Step 7
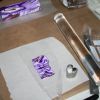
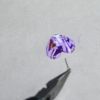
Cutting out your shapes. I use cutters but you can draw you shapes on a piece of paper cut them out and use them as a template to cut around with and Exacto knife. Your edges will be sharp but if you gently pet your edges it will round them off. (if you want the back of your earring to be a solid color roll out a thin sheet of clay and place your slice on it before cutting)
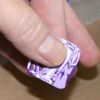
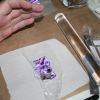
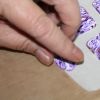
Using cutters, stretch saran wrap over your clay slice.
(Make sure it smooth) place your cutter where you want then press down and give a very slight twist.
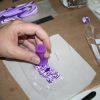
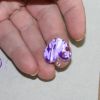
Lift you cutter. Once your cuts are made peel the saran wrap and the surrounding clay. If I am making studs I usually can get 2 studs out of each slice.
Gently pet the top of you clay to remove finger print and to make sure it is smooth.
If you are just making studs it is time to bake go to step 9, if you are wanting dangles then on to step 8
Step 8
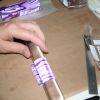
Trim you eye pins. You want at least ¼ “ inside the clay. Gently press your eye pin in the clay where you want them. Do not worry which direction the eye pin is face you will be removing it after bake.
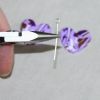

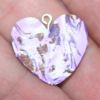
Pet you clay to remove any marks or finger prints.
Step 9
Preheat your oven to the manufacture instruction. You can find them on the side of your clay package. You need an oven thermometer to keep an eye on the temperature. You do not want to burn your clay. I know the instruction will say something like 15 minutes for every 1/4 inch. I bake everything for at least 45 to 60 minutes.
Get your baking surface ready I place parchment or printer paper in the bottom and lay my pieces on the paper. Take a piece pf paper large enough to fold in half and create a tent over you clay pieces. This will help prevent burning do to hot spots in your oven.
Now bake in a preheated oven.
Let cool before the next step.
Step 10
Take a pair of chain nose plier and remove the eye pins.
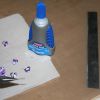
Add clue to the pins and reinsert. Remember you need to position your eye pins in the direction you need.
If you are glossing now is the time to gloss.
When gloss is dry glue the ear studs on.

For the dangles use a jump ring to attach the 2 pieces together.
Now you have some great ear rings.


I am lousy at editing myself so if you see a typo or misspelled word contact me privately and I will fix it thanks.


-
 1
1


Recommended Comments
Join the conversation
You can post now and register later. If you have an account, sign in now to post with your account.