Swirl Pillar
By celicagtca
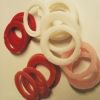
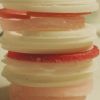
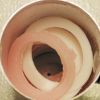
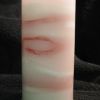
Once again the directions are below, but I'm posting 4 basic pictures on how I did it. Step 1 is the diff., colored circles, Step 2 is how many of the colors I coordinated together, Step 3 is dropping them into the mold (let them lay the way they fall) if some are lopsided, that's ok, then the finished product pic. If you put more white in between the colors, you get more of a swirled look.
I used 4625 pre-blended pillar wax for the whole project. I used 2 colors with liquid dye and a touch of titanium dioxide for the white. Three colors in total. You'll need at least 3 cookie sheets or (1) but it will take you a little longer with the (1). Melt about 1/2 lb. to 1 lb. of wax for each color, pour into cookie sheets and let stand for about 10 minutes. I used a tin can that was just a bit smaller than a 3" diameter mold and another tin smaller than the first. Punch out a bunch of circles into your wax and inner circles so the finished wax looks like donuts or candle rings. Stick them in the fridge or freezer for just a bit so they release from the cookie sheets. I used a spatula to lift the wax and then punched out the circles and the inner circles.
Melt more 4625 wax, about 1 lb. for your final pour. I added the same FO to all of the wax even the plain 4625.
Drop the circles into the mold, a few pink, a few coral a few white. Keep doing this till you get to the top of the mold. Pour the clear wax (no color) at 160 degrees, on top of the rings. Use a heat gun around your mold for about 1-2 minutes.
Let stand till they’re done.
-
 3
3


Recommended Comments
Join the conversation
You can post now and register later. If you have an account, sign in now to post with your account.