

Rebatching fugly pillars
by Georgia
Rating for class: Beginner-intermediate.
Required:
a) Basic knowledge of pillar candle making
Materials needed for class:
1 (or more) fugly pillar – wrong color(s), bad layering, or sun faded.
Protected work surface – wax paper, butcher paper, newspaper
Oven mitt, gardening gloves or wad of paper towels to cushion hand
Extra pillar wax
FO and color optional
Tools for class:
Mold with wick or wick pin
Double boiler or presto
Large butcher knife
Directions:
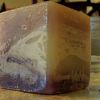
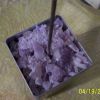
Start with one faded, too dark, wrong color or just plain fugly candle. This one started out lavender, white and purple and after a day in the sunshine ended up brown, yellow and purple. Yuk!
Cover your work surface with butcher paper, wax paper, newspaper, or, in my case, a sheet of .040” thick polycarbonate.
Prepare your mold with wick or wick pin and figure how much wax will be needed for the new mold. Weigh your prepared mold. Mine weighs 7 oz.
If you start with a 3x3 pillar you can end up with a 3x4 pillar. Or if you use the excess for the over pour, you can end up with a 3x3. I started with a 3x3 and prepared a 3x4 mold. The “Handy Calculator” http://www.candletech.com/general-in...dy-calculators/ says I need 20 oz of wax, but I know with my wax I need 22 oz.
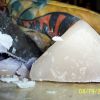
Using a butcher knife and something to cushion your hand, start by cutting the candle in half. Along with giving you a larger flat area to work with it allows you to see if you had any air pockets in the candle. Dissection is a good thing to do every now and then.
I have my old Tigger hot mitt, but gardening gloves or a wad of paper towels work well.
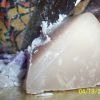
Start slicing the candle. Make cuts from 1/8” to ¼” to 3/8” thick. Vary the thicknesses to give some chunks and some shreds.
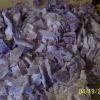
You will end up with a pile of wax looking somewhat like pulled pork.
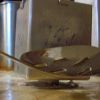
If your mold is really cold, zap the bottom with the heat gun. Dump handfuls of wax into your prepared mold. Shake and tamp to pack it in fairly well. I use my fingers to press it in. As you shake the tiniest particles will end up in the bottom of the mold. You need the mold warm there or your over pour may not be warm enough to turn the crumbles into a solid candle.
Weigh the filled mold and subtract the empty mold weight to figure how much over pour you will need. Mine weighed 25 oz. So, subtracting the empty mold weight (7 oz.), I know I have 18 oz. of shreds and need 6 oz. of over pour (22-18=6)
Heat your over pour wax to around 190*. You can scent it or not as you wish. I don’t add anything except UV inhibitor to my over pour but you can add whatever you normally add to pillar wax – UA, vybar, steric. You can even add more color or a contrasting color.
Pour the over pour quickly down the center of the mold. Tap the sides with a spoon to dislodge any air bubbles. You can also zap the sides with a heat gun for a smoother surface.
Now, have patience and wait for the candle to completely cool.
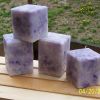
These are out of the mold and looking a bit like cotton candy. Much better than the original candle! (Yes, I had more than just that little 3x3 fugly to start with!)
-
 1
1


Recommended Comments
Join the conversation
You can post now and register later. If you have an account, sign in now to post with your account.