

Water Soluble Paper in M&P
By maryann
STEP 1. Choose your graphics and print them out just like you would on a "regular" sheet of paper. Some of the graphics pictured are from pcCrafter.
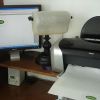
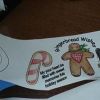
STEP 2. Cut your graphics out. I cut as close to the graphic as possible that way there's less of a chance that the white background will show up in the soap.
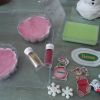
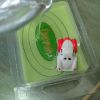
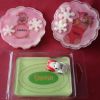
STEP 3. I've skipped a few steps here- as you can see in the picture below I have already poured soap in three molds and their set up. I gathered everything I needed so it’s right at my fingertips. I'm adding unscented white snowflake M&P embeds (from Flexiblemolds.com) and cosmetic glitter besides my graphics. Now I melt my clear M&P base and let it cool. Tips: Don't pour too hot or it will disintegrate the paper. I wouldn't scent the embeds or the clear base as they could turn brown from the FO. Fo's also cause the clear base to become cloudy (as does putting your molds in refrig or freezer). The big snowflake mold came from NG, under Soap Mold-Snowflakes.
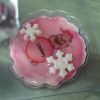
STEP 4. Before you pour the clear M&P base spray the layer of soap you have in the molds with rubbing alcohol. This will do 2 things; adhere the layers together and help the graphic blend into the bottom layer of soap better. Spray lightly, if you spray too much the ink from your graphics will run (if not using a water resistant printer ink). Then place your graphic and/or embeds on to the layer in the mold(s), then lightly spritz with rubbing alcohol again and ........
STEP 5. Pour
STEP 6. Pour
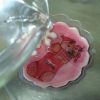
STEP 7. Pour. Tips: I heat this super slow so I do not create any bubbles. Since I do not add anything to the base I do not stir it. Taking these 2 things into consideration I have very little, if any bubbles. I also pour slowly so I do not create any bubbles, if I do have any bubble I spray VERY lightly with rubbing alcohol. I've found that if I overdue it with the spraying it clouds the clear base. I also keep a wooden skewer close by to get anything out of the layer I just poured, whether it’s a bubble or soap that's set up before the rest has and looks out of place.
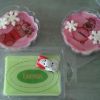
Step 8. At this point I let it rest a few hours in the mold. Once its set up I carefully, with LOTS of acquired patience take it out of the mold. One thing I have found is that putting it in the freezer or refrig even if it’s for a few minutes will cloud the clear base, and you won't be able to see your graphic as well.
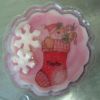
Step 9. Wrap it up to stop it from sweating and at this point you may need a stiff drink!
This is not an easy process. It took me MANY trials to get to the point I have in Step #9. Have fun and it does take a little practice to get it down.
Other things to remember: If you use a colored bottom layer it will eventually bleed into the clear base. Also chances are if you scented the bottom layer, the clear layer after sitting a few weeks to a month will turn yellowish no matter what FO you use.


Recommended Comments
Join the conversation
You can post now and register later. If you have an account, sign in now to post with your account.