

Soap Swirls in a Log Mold
Before beginning this tutorial, you should know the basics of cold process soap making and lye safety.
Supplies:
Lye Pitcher
Bowl/Pitcher (for melting oils)
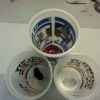
3 Cups (for colorants)
Stick Blender
Spatula
Spoon
Bamboo Skewer
Distilled Water
Cp Recipe of Choice
Colorants
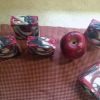
I'll be using Peak's Apple Blossom fragrance (my Poisoned Apples scent).
I'll be using 3 colorants- titanium dioxide, black oxide and a mix of colorana bordeaux and ruby to make a red.
This is a fun and simple way to make swirls in log molds. You can create different looking swirls with this technique simply by pouring at different traces. A thinner trace will produce a faux funnel look. Pouring thicker will result in a slightly swirled, layered look. Pouring at a medium trace-- the trace I'll be pouring at-- will result in a more swirled look. Also, you can achieve different looks by pouring less or more. It's super versatile!
Let's get started!!!
Have your lye water and melted oils at room temperature.
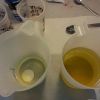
Also, have your choice of colorants put into your cups.
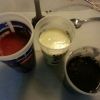
1. Pour your lye water into your oils and stick blend until you reach a very light trace.
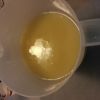
2. Pour the soap into the cups that contain colorant. I wanted slightly more red, so I poured more soap into my cup with red colorants.
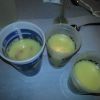
3. Starting with the lightest color first, give it a few shots with the stick blender until the color is well blended. Don't over blend, as this will thicken the trace too fast.
4. Blend the next color, in this case it was my red, until the color is well blended.
5. Saving the darkest color for last, blend well. (By blending from lightest to darkest, you save yourself from having to clean off your stick blender between each color)
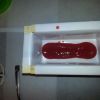
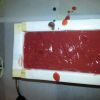
6. We are now ready to start pouring into our log molds. I'll be starting with my red and pouring in a straight line down the middle.
7. Next, I pour my white down the middle, directly over the red.
8. Grab your next color and pour down the middle, directly over the white.
9. Continue to do this with each color (Remember, the deeper the soap is, the higher you need to hold your cup up so that the colors go down into one another). Don't worry if you get off center while pouring, that will just add to the character of the soap.
Save enough soap in each cup to decorate the top.
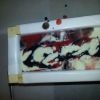
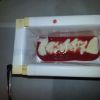
10. I'm doing a mantra swirl on top of this soap. I'll be pouring red across the entire top of the soap (in this case, I want to pour quite close to the soap, so I don't break through the soap underneath).
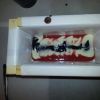
11. Pour a line of white and then a line of black, straight down the middle.

12. Next, take your bamboo skewer and make a figure 8 pattern down the entire length of the mold, being careful to stick the skewer about 1/4" into the soap. .

13. Now it's time for the soap to take a nice warm nap. I like to put mine in a warm oven, especially when it is particularly cold outside.
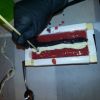
14. Wait 24 hours and then cut the soap.
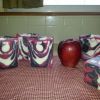
Thanks for reading. Now go create some beautiful swirls!!
-
 1
1
-
 1
1


Recommended Comments
Join the conversation
You can post now and register later. If you have an account, sign in now to post with your account.