

Rebatch Soap
By thecandlespastore
Hello all! I had to rebatch for the first time in quite a while this week and thought I would take some pics and do a tutorial for the forum. Rebatching is not as hard as it seems, and it’s even easier with fresh soap (as in soap that is less than 3 weeks old.) In fact, it’s quite easy and should take less than 50 minutes.
The things you will need to rebatch your soap:
A crock pot that can hold your batch (6 quart or larger)
or
Double Boiler
Cutting Board
Good sized knife
If your soap is over 5 weeks old, have a cup of distilled water or fluid of your choice. You can add the fluid 1 teaspoon at a time to increase fluidity in your soap, but usually you will not need additional fluid. If your soap is under 4 weeks old, please do not use any additional fluid, it should still have enough in it to melt. You do not want a runny rebatch, more times than not it will never harden or take forever to harden.
The smaller you cut the soap, the easier it will melt down and be uniform.
Now on to this batch. I needed to restock some Mango and Papaya to make myself feel like spring had finally arrived (even though its still freezing here!) I planned for a 4 color swirl, the batch was going to be gorgeous. I had already used this same exact recipe to make 4 prior batches the same night. It was 1:30 in the morning and I had had 1 wine cooler.
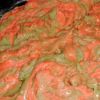
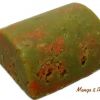
I really don't know why this batch reacted the way it did, but it could have been my low tolerance for alcohol and not thinking clearly because of it that made me fubar this one. But here it is in all its glory:

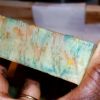
Quite gross if I do say so myself!! I guess not stick blending it and hand whisking it instead was not such a great idea, since that is the only thing I can think of that I did differently. The soap did not zap when I tasted it (by touching it with my finger and then tasting the finger of course, learned my lesson licking a bar of soap with my tongue years ago!) I am going to take a guess that the fragrance was not fully incorporated which gave me this oozing mess.
After letting it sit for a week and a half to see it if would miraculously firm up and absorb the oil, I realized that it was not going to happen.
So I:
1. Turned on my crock pot so that it could be piping hot when I was ready to go. This speeds up the process and cuts at least 20-30 minutes out of your time.
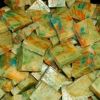
2. Cut my soap bars in half, then sliced the bar into 8 pieces, and poured into my crock pot:
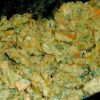
3. Soap after 20 minutes of cooking:
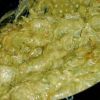
4. 15 minutes later I added a touch of honey just for the heck of it:
5. At this point I realized that all those pretty colors were finite and that I had to do something if I did not want to end up with pea green mango and papaya soap. So I grabbed one of my neon oxides and did a quite color fix:
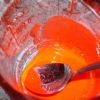
6. Scooped a bit of the soap out and stirred it into the color:

7. Glopped back into the main batch and did an in the pot swirl marble:
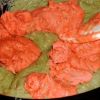
8. Spooned into my Tony Molds and set them aside. Notice the soap is still pretty fluid and scoop able, no additional fluids were needed:
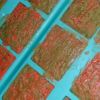
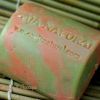
The finished bar unmolded the next day after a quick 1 hour detour in the freezer, popped right out of the mold. Sometimes a rebatch will have to sit in the mold an extra day or two to shrink a bit. If you use a log mold make sure to bang the crap out of it to get out any air bubbles when you pour into your mold. Same thing with using a slab mold:


Recommended Comments
There are no comments to display.
Join the conversation
You can post now and register later. If you have an account, sign in now to post with your account.