

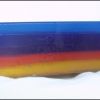
Rainbow/Layered Melt & Pour Soap
By Sara

Making the Soap
This tutorial is written assuming you have the basic hang of making melt and pour soaps and are ready to try some different techniques.
Supplies Needed
- Melt and pour soap
- Mold (a rectangular or loaf pan is best for this type of soap make sure it is clean and able to withstand the heat of the soap)
- Fragrance, if desired (I used the same fragrance with all layers)
- Soap-safe colors
- witch hazel (in spritzer)
- microwave-safe bowl (preferably a glass measuring cup, Pyrex, for example)
- spoon or chopstick to stir
- scale
First figure out how much soap you need for your mold. Fill the mold with water, then measure the amount of water needed to fill it up. A lined, glass measuring cup works well. If you have 24oz. of water, that will give you a rough idea of how much soap you will need.
My mold holds 3 pounds of soap. We will use this amount for the tutorial and make six 8oz. layers. You might want to spray the mold with Crisco, or a light coating of petroleum jelly.
Heat your soap, let it cool again until a skin forms on top, then gently stir that in, scent/color as desire and pour into the prepared mold. A quick spritz with alcohol will deter bubbles.
While that layer is firming up, prepare the same amount of soap for the next layer. You don't want to pour your layers too hot or the fresh soap will melt the lower layer and "bleeding" will occur.
When the first layer is firm and has formed a nice skin on it, pour the prepared 2nd layer over. I poured mine over the back of a spoon, being gentle not to disturb the first layer. Sometimes it helps to pour closer to the edges where the soap is more firm.
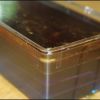
Continue this process until all layers are poured. The soap will take a while to set up completely. You can speed up the process by putting it in the refrigerator. Cut and enjoy!!
-
 1
1


Recommended Comments
There are no comments to display.
Join the conversation
You can post now and register later. If you have an account, sign in now to post with your account.